Nov 21 st , 2013 | Comments
This post will show how to create a Student Enrollment Application using MYSQL DB with Struts 2 framework. This is a simple application that aims to collect the input details from the user during signup, save the details in the MYSQL DB and authenticate the same during login.
To begin with, in the IDE, create a Java Dynamic Web project for the application. While creating the dynamic web project, enable the checkbox to generate web.xml deployment descriptor.
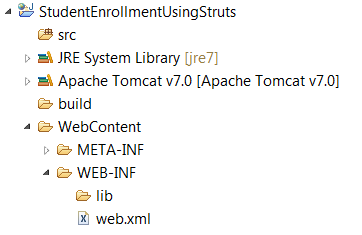
The sample web application directory structure is shown below with a standard deployment descriptor web.xml
Modify the contents of the web.xml to include the following:
Create a file named db.properties under the src folder, where the properties of the MYSQL DB like url, username and password can be specified. Replace with the actual connection url for connecting to the MYSQL DB. Likewise, replace and with the actual username and password values.
1 2 3 4
dbDriver=com.mysql.jdbc.Driver connectionUrl=jdbc:mysql://:3306/studentEnrollment userName= password= Create a POJO class named DbUtil.java under the package com.github.elizabetht.util to include a helper class functionality that would load the db.properties file and get the database connection.
1 2 3 4 5 6 7 8 9 10 11 12 13 14 15 16 17 18 19 20 21 22 23 24 25 26 27 28 29 30 31
public class DbUtil private static Connection dbConnection = null; public static Connection getConnection() if (dbConnection != null) return dbConnection; > else try InputStream inputStream = DbUtil.class.getClassLoader() .getResourceAsStream("db.properties"); Properties properties = new Properties(); if (properties != null) properties.load(inputStream); String dbDriver = properties.getProperty("dbDriver"); String connectionUrl = properties .getProperty("connectionUrl"); String userName = properties.getProperty("userName"); String password = properties.getProperty("password"); Class.forName(dbDriver).newInstance(); dbConnection = DriverManager.getConnection(connectionUrl, userName, password); > > catch (Exception e) e.printStackTrace(); > return dbConnection; > > >Create a Repository tier POJO class named StudentRepository.java under the package com.github.elizabetht.repository to support the database operations of saving the student details, verifying the student login details and checking if the username exists when a save is attempted.
1 2 3 4 5 6 7 8 9 10 11 12 13 14 15 16 17 18 19 20 21 22 23 24 25 26 27 28 29 30 31 32 33 34 35 36 37 38 39 40 41 42 43 44 45 46 47 48 49 50 51 52 53 54 55 56 57 58 59 60 61 62 63 64 65 66 67 68 69 70 71 72 73 74 75 76 77
public class StudentRepository private Connection dbConnection; public StudentRepository() dbConnection = DbUtil.getConnection(); > public void save(String userName, String password, String firstName, String lastName, String dateOfBirth, String emailAddress) if (dbConnection != null) try PreparedStatement prepStatement = dbConnection .prepareStatement("insert into student(userName, password, firstName, lastName, dateOfBirth, emailAddress) values (?, ?, ?, ?, ?, ?)"); prepStatement.setString(1, userName); prepStatement.setString(2, password); prepStatement.setString(3, firstName); prepStatement.setString(4, lastName); prepStatement.setDate(5, new java.sql.Date(new SimpleDateFormat("MM/dd/yyyy") .parse(dateOfBirth.substring(0, 10)).getTime())); prepStatement.setString(6, emailAddress); prepStatement.executeUpdate(); > catch (SQLException e) e.printStackTrace(); > catch (ParseException e) e.printStackTrace(); > > > public boolean findByUserName(String userName) if (dbConnection != null) try PreparedStatement prepStatement = dbConnection .prepareStatement("select count(*) from student where userName = ?"); prepStatement.setString(1, userName); ResultSet result = prepStatement.executeQuery(); if (result != null) while (result.next()) if (result.getInt(1) == 1) return true; > > > > catch (Exception e) e.printStackTrace(); > > return false; > public boolean findByLogin(String userName, String password) if (dbConnection != null) try PreparedStatement prepStatement = dbConnection .prepareStatement("select password from student where userName = ?"); prepStatement.setString(1, userName); ResultSet result = prepStatement.executeQuery(); if (result != null) while (result.next()) if (result.getString(1).equals(password)) return true; > > > > catch (Exception e) e.printStackTrace(); > > return false; > >Create a Controller tier POJO class named StudentService.java inside the package com.github.elizabetht.service. This layer acts as a median between the Controller and Repository tier classes.
1 2 3 4 5 6 7 8 9 10 11 12 13 14 15 16 17 18 19 20 21 22 23 24 25 26 27 28 29 30 31 32 33 34
public class StudentService private StudentRepository studentRepository; public StudentService() studentRepository = new StudentRepository(); > public String save(String userName, String password, String firstName, String lastName, String dateOfBirth, String emailAddress) if (studentRepository != null) if (studentRepository.findByUserName(userName)) return "SignupFailure-UserNameExists"; > studentRepository.save(userName, password, firstName, lastName, dateOfBirth, emailAddress); return "SignupSuccess"; > else return "SignupFailure"; > > public String findByLogin(String userName, String password) String result = "LoginFailure"; if (studentRepository != null) boolean status = studentRepository.findByLogin(userName, password); if (status) result = "LoginSuccess"; > > return result; > >Create a Controller tier POJO class named StudentController.java inside the package com.github.elizabetht.controller. This is where the routing logic of the application goes – whether a signup or login action is called. For simplicity sake, two separate action classes are created for each of the operation.
Each of the Action class has to implement the execute() method. Based on the String result returned from the execute() method of the action class, the appropriate view page is rendered.
In most cases, the action class is extended from the general ActionSupport class, which has a lot of easy to use convenient features. So, extend the ActionSupport class in the Action class, unless you have a reason not to!
The following snippet shows the SignupAction class.
1 2 3 4 5 6 7 8 9 10 11 12 13 14 15 16 17 18 19 20 21 22 23 24 25 26 27 28 29 30 31 32 33 34 35 36 37 38 39 40 41 42 43 44 45 46 47 48 49 50 51 52 53 54 55 56 57 58 59 60 61 62 63 64 65 66 67 68 69 70 71 72 73 74 75 76 77 78 79 80 81 82 83 84 85 86 87 88 89 90 91 92 93 94 95 96 97 98 99 100 101
@SuppressWarnings("serial") public class SignupAction extends ActionSupport private String pageName; private String userName; private String password; private String firstName; private String lastName; private String dateOfBirth; private String emailAddress; @Action("signup-input") public String input() throws Exception return "signup"; > @Override @Action(value = "signup", results = < @Result(name = "login-input", location = "login-input", type = "redirect") >) public String execute() throws Exception String result = ""; StudentService studentService = new StudentService(); if (pageName != null && studentService != null) if (pageName.equals("signup")) result = studentService.save(userName, password, firstName, lastName, dateOfBirth, emailAddress); if (result.equals("SignupSuccess")) return "login-input"; > else return "failure"; > > > return SUCCESS; > public String getPageName() return pageName; > public void setPageName(String pageName) this.pageName = pageName; > public String getUserName() return userName; > @RequiredStringValidator(type = ValidatorType.FIELD, message = "UserName is a required field") @StringLengthFieldValidator(type = ValidatorType.FIELD, maxLength = "12", minLength = "6", message = "UserName must be of length between 6 and 12") public void setUserName(String userName) this.userName = userName; > public String getPassword() return password; > @RequiredStringValidator(type = ValidatorType.FIELD, message = "Password is a required field") @StringLengthFieldValidator(type = ValidatorType.FIELD, maxLength = "12", minLength = "6", message = "Password must be of length between 6 and 12") public void setPassword(String password) this.password = password; > public String getFirstName() return firstName; > @RequiredStringValidator(type = ValidatorType.FIELD, message = "FirstName is a required field") public void setFirstName(String firstName) this.firstName = firstName; > public String getLastName() return lastName; > @RequiredStringValidator(type = ValidatorType.FIELD, message = "LastName is a required field") public void setLastName(String lastName) this.lastName = lastName; > public String getEmailAddress() return emailAddress; > @RequiredStringValidator(type = ValidatorType.FIELD, message = "EmailAddress is a required field") @EmailValidator(type = ValidatorType.FIELD, message = "Email Address must be valid") public void setEmailAddress(String emailAddress) this.emailAddress = emailAddress; > public String getDateOfBirth() return dateOfBirth; > @RequiredStringValidator(type = ValidatorType.FIELD, message = "DateOfBirth is a required field") public void setDateOfBirth(String dateOfBirth) this.dateOfBirth = dateOfBirth; > >Similar to the SignupAction class, the LoginAction class also implements the execute() method as shown below
1 2 3 4 5 6 7 8 9 10 11 12 13 14 15 16 17 18 19 20 21 22 23 24 25 26 27 28 29 30 31 32 33 34 35 36 37 38 39 40 41 42 43 44 45 46 47 48 49 50 51 52 53 54 55 56 57 58 59
@SuppressWarnings("serial") public class LoginAction extends ActionSupport private String pageName; private String userName; private String password; @Action("login-input") public String input() throws Exception return "login"; > @Action("login") public String execute() throws Exception String result = ""; StudentService studentService = new StudentService(); if (pageName != null && studentService != null) if (pageName.equals("login")) result = studentService.findByLogin(userName, password); if (result.equals("LoginFailure")) return "failure"; > else return "success"; > > > return SUCCESS; > public String getPageName() return pageName; > public void setPageName(String pageName) this.pageName = pageName; > public String getUserName() return userName; > @RequiredStringValidator(type = ValidatorType.FIELD, message = "UserName is a required field") @StringLengthFieldValidator(type = ValidatorType.FIELD, maxLength = "12", minLength = "6", message = "UserName must be of length between 6 and 12") public void setUserName(String userName) this.userName = userName; > public String getPassword() return password; > @RequiredStringValidator(type = ValidatorType.FIELD, message = "Password is a required field") @StringLengthFieldValidator(type = ValidatorType.FIELD, maxLength = "12", minLength = "6", message = "Password must be of length between 6 and 12") public void setPassword(String password) this.password = password; > >The @Action annotation is used to specify the incoming requested URL and results to be rendered. For results other than SUCCESS (or the equivalent success string), the resulting view will be rendered based on the value of the result. For instance, in SignupAction class, if “failure” string is returned from the execute() method, the result will be appended to the @Action value (which is “signup”, in this case) and the signup-failure.jsp page will be rendered. Similarly, in LoginAction class, if “failure” string is returned from the execute() method, the login-failure.jsp page will be rendered.
If SUCCESS (or the equivalent success string) is returned from the execute() method, the actual value of action will be the resulting view, unless there are no results specified using the @Result annotation. For instance, in LoginAction class, there are no @Result annotations used and hence, login-success.jsp will be rendered when execute() method returns a SUCCESS string.
But if there are results specified with @Result annotation as in SignupAction class, the name and location given by the results array will determine the view rendered – in this case, login-input action will be rendered (which is in-turn, an action specified by the LoginAction class).
As shown in the above snippets of SignupAction and LoginAction classes, add the following required validators to the setter methods for the fields.
@RequiredStringValidator is used to check that a String field is not empty.
@StringLengthFieldValidator is used to check that a String field is of the right length. It assumes that the field is a String. If neither minLength nor maxLength is set, nothing will be done.
@EmailValidator is used to check that a field is a valid e-mail address if it contains a non-empty String.
Connect to the MySQL DB which is to be used for this application and create a new DB Schema named studentEnrollment using the MySQL Workbench. This is necessary as the DB Schema name of studentEnrollment is specified in the db.properties file.
Once the studentEnrollment DB Schema is created, create a table named student inside the DB Schema using the CREATE TABLE statement as follows:
1 2 3 4 5 6 7 8 9 10
CREATE TABLE `student` ( `id` bigint(20) NOT NULL AUTO_INCREMENT, `dateOfBirth` datetime NOT NULL, `emailAddress` varchar(255) NOT NULL, `firstName` varchar(255) NOT NULL, `lastName` varchar(255) NOT NULL, `password` varchar(8) NOT NULL, `userName` varchar(20) NOT NULL, PRIMARY KEY (`id`) ) ENGINE=InnoDB AUTO_INCREMENT=43 DEFAULT CHARSET=latin1;Once the above steps are complete and the project is successfully built, the Java web application is ready to deployed on the Tomcat Server 7.
The Java web application can be deployed locally by right clicking on the project and choosing the “Run As->Run on Server” option.
The same can be deployed remotely on any native server that supports Tomcat by copying the WAR file (Right click on the project and choose Export as WAR File option) to /var/lib/tomcat7 folder (or appropriate tomcat directory) and restarting the tomcat server.
In case of not using git, download the project as ZIP or tar.gz file here: https://github.com/elizabetht/StudentEnrollmentWithStruts/releases/tag/1.4
Posted by Elizabeth Thomas Nov 21 st , 2013 Struts2